
Tutorial Part 1. Building Pfsense Server
With the rapid development of technologies, most companies are providing 24/7 support to their customers. To keep their business running efficiently and provide the best quality service to the customers. Most enterprises rent telecom operations, buying software, firewalls, or VPN equipment to build a VPN network ensures the enterprise's internal business system's security.
Currently, the foremost VPNs used by enterprises are hardware VPNs, and the protocols are SSL VPN, L2TP VPN, IPsec VPN, etc. However, these VPN devices are expensive and have poor client compatibility and are required to be updated continuously. If businesses choose to rent a third-party VPN directly, there are also security concerns.
This article will be a guideline for using open source free firewall software pfSense and building a VPN network based on the IPsec IKEv2 protocol. So that individuals can use the Internet to access server-side resources and websites through the VPN securely, whether they are at home or abroad.
What we need :
cloud server, pfSense software, StrongSwan APK installation package (Android smartphone), Windows 10 (dial-up connection), IOS/Mac OS (native support for IPsec VPN).
1. Log in to the console and purchase a cloud server containing the Pfsense image. After the server is generated, we can directly access the Pfsense console through the cloud server's IP.
2. Enter the login page of PfSense through the public address. Enter the default user name: admin, password: pfsense

3. Configure the certificate that the IPsec VPN will use:
Enter the main control panel: select system-> Cert.Manager
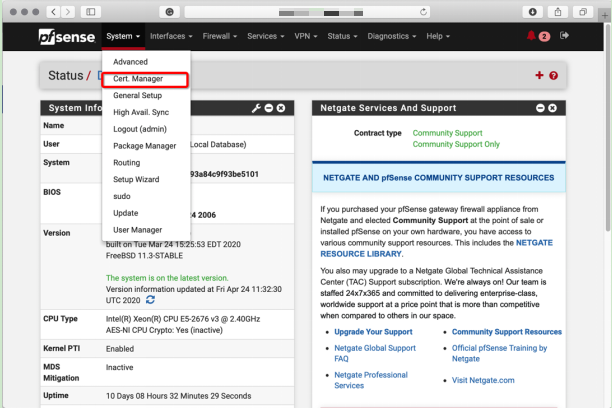
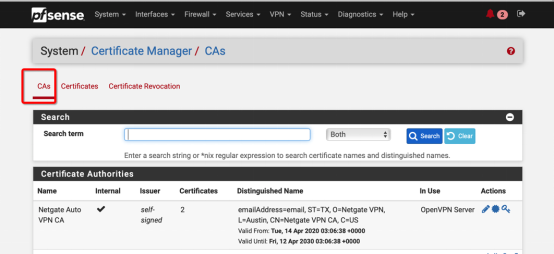
Select "CAs", then select "Add" in the lower right corner.
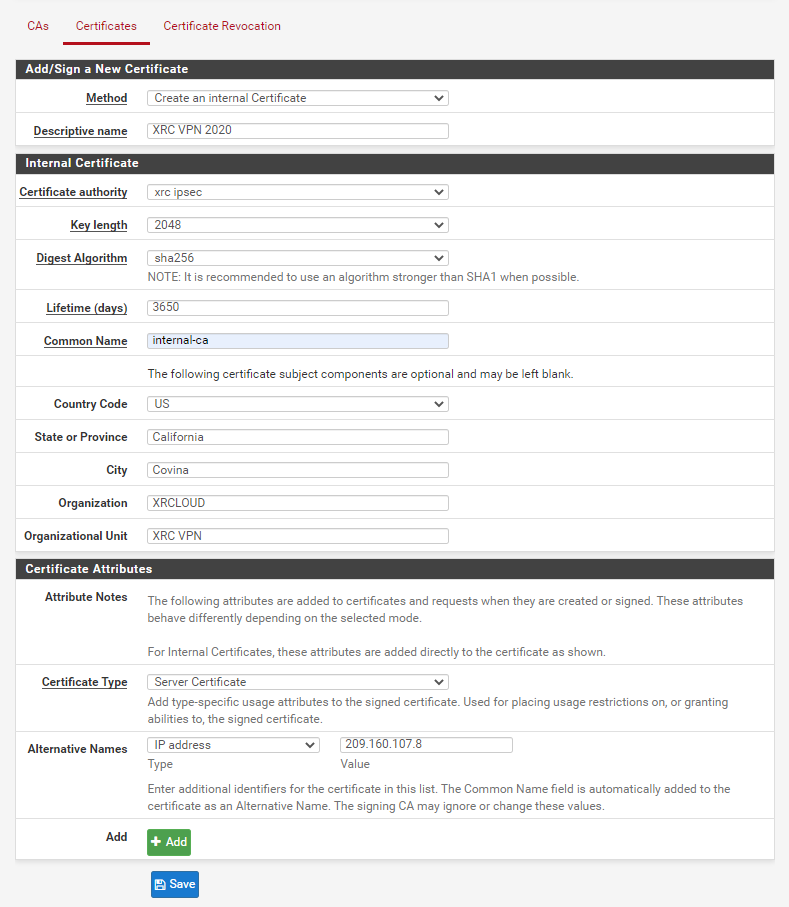
Create a certificate: select "Certificates". Then click the green button "Add" in the lower right corner:

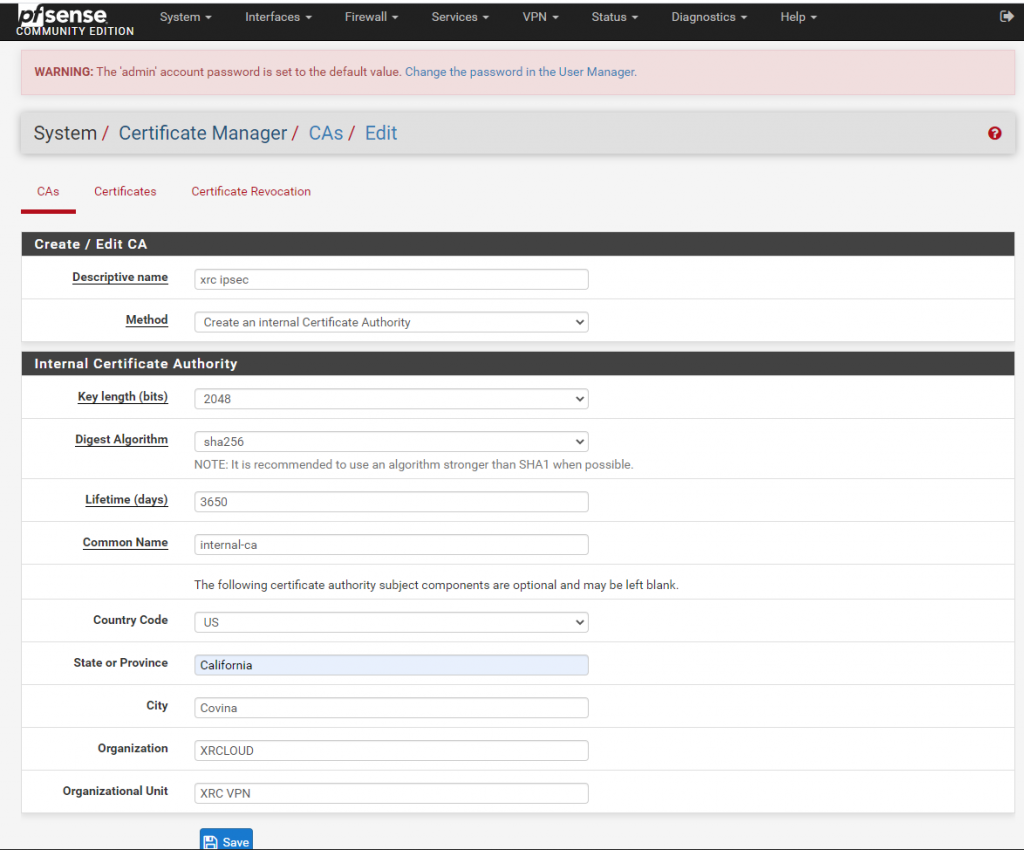
Fill in the certificate-related information:
Select "Create an internal Certificate",
The description name can be named according to our preference, for example, "XRC VPN 2020".
For the issuing authority, please select the authority that was created in "CAs".
For the common name, it is also named by our preference, for instance: www.xrcloud.com.
Afterward, select "Server Certificate."
Select the IP Address for the available name, and then fill in the public network address corresponding to our cloud server.
After saving it, we can view the certificate that we just create, and we can export the certificate to .Crt and .P12 formats.

4. Create IPSec VPN:
Click "VPN" and select "IPsec".
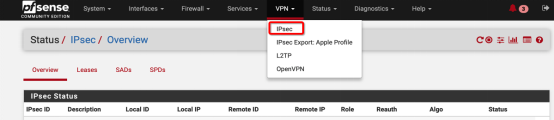
Please select ”Mobile Clients”
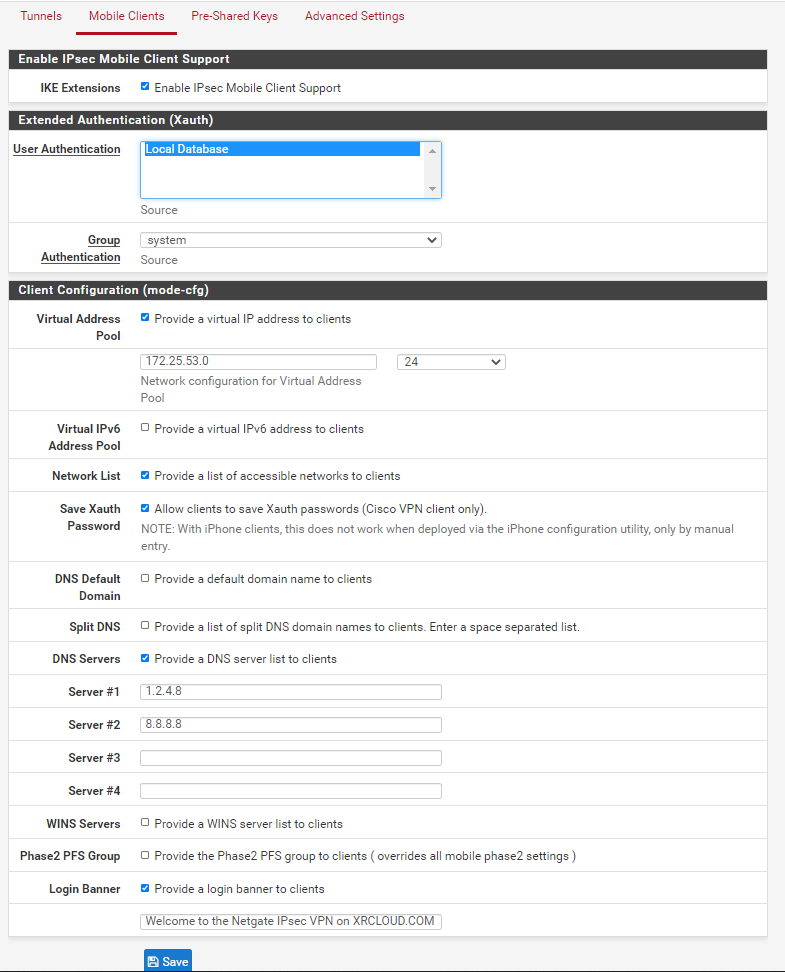
Select "Enable IPsec Mobile Client Support".
Select "Local Database"
Select "System"
Select "Provide a Virtual IP Address to clients", and then configure the internal network address according to our preference. The example configuration is "172.25.53.0", and the following mask selects "24".
Afterward, configure the DNS, fill in the DNS provided from the cloud service provider, or we can also configure the public DNS, for instance, 1.2.4.8, or 8.8.8.8. Finally, save the results. Thus the Mobile part is configured, and this will leads us to the next step, which we will need to enter the IPSec Tunnel configuration.
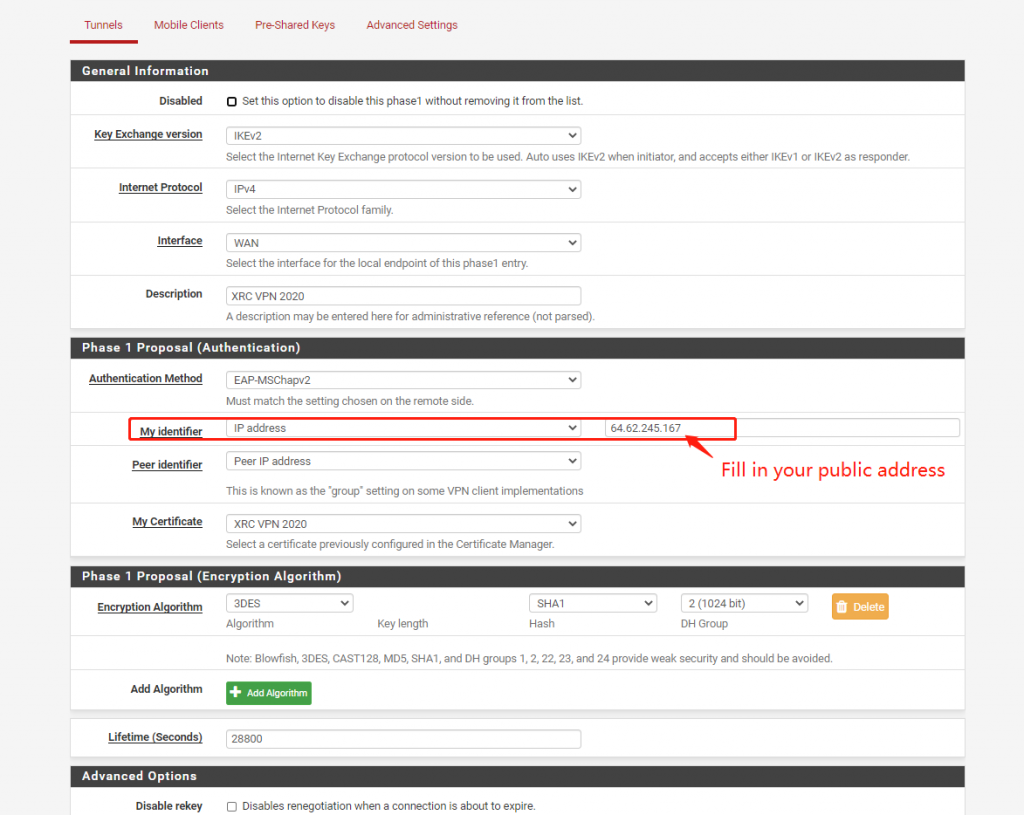
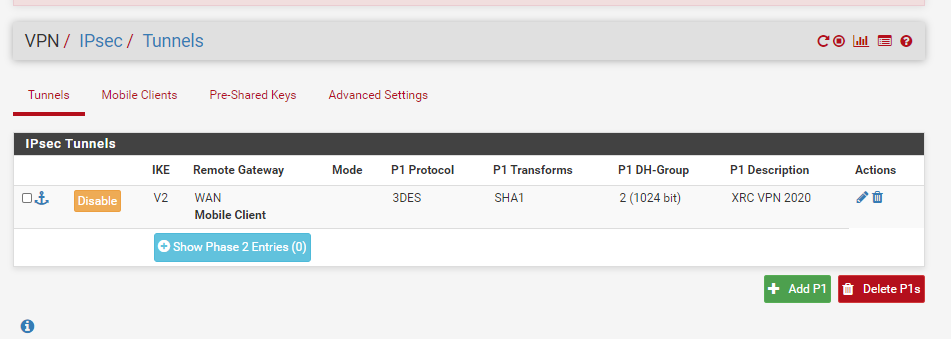
Configure "IPSec Tunnels" then select "IKEv2" and select IPv4 or "Both"
Please remember to choose the authentication method "EAP-MSchapv2"
For my identifier, select "IP Address" and then enter the cloud server's public network address, which is consistent with the public network address in the previous certificate.
Select "3DES", "SHA1", "2(1024bit)" for message encryption.
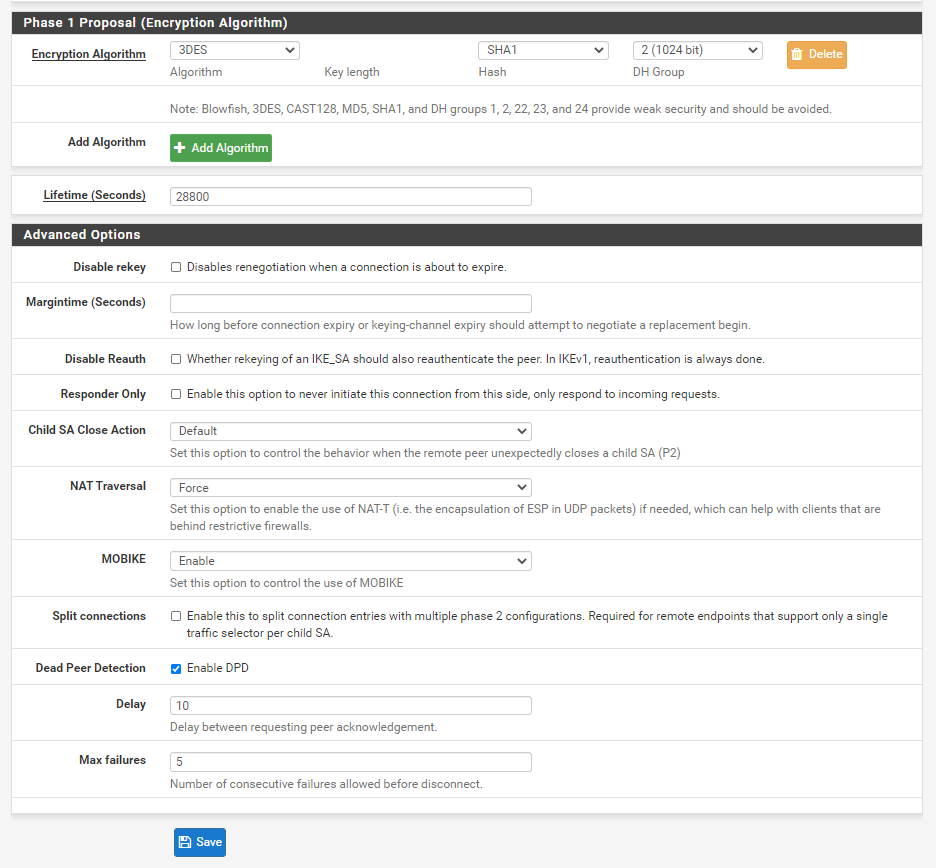
NAT select to open "FORCE".
MOBIKE enable "ENABLE"
Save the configuration.
Let us start to enter the configuration "P2" phase.
Select "Show Phase 2 Entries", click the green button "Add P2" in the lower right corner to enter configuration P2.
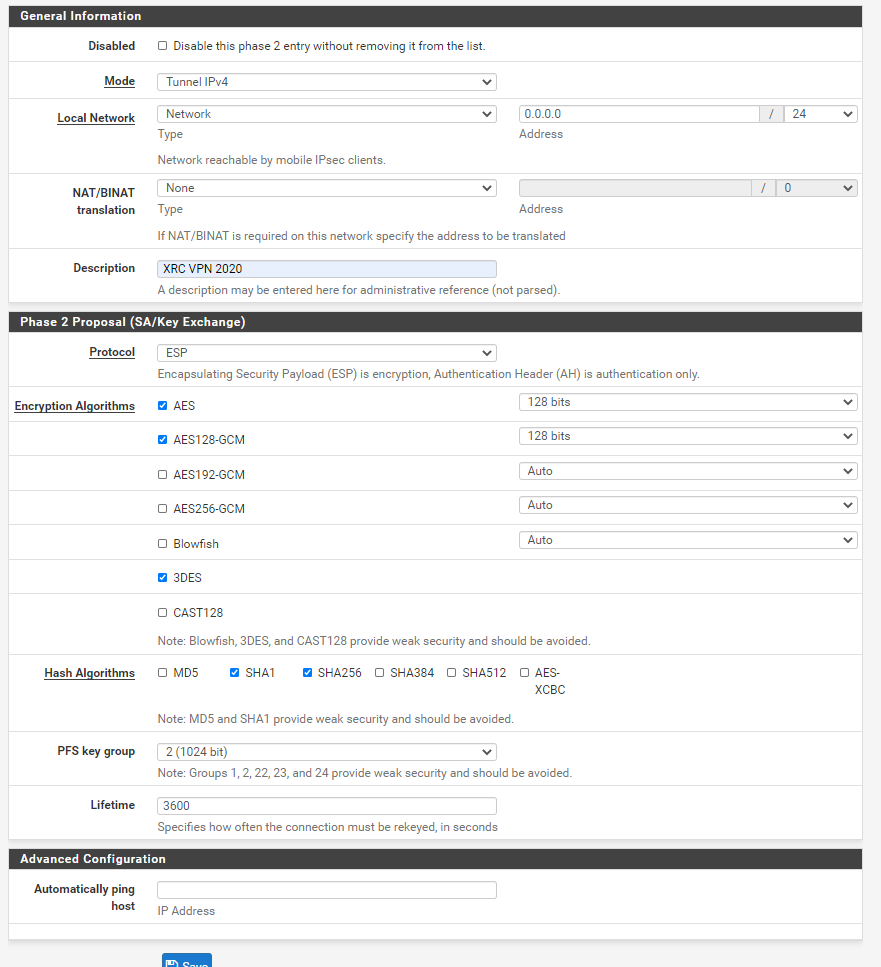
Select "IPv4", Local Network select "Network", address configuration "0.0.0.0", mask configuration "0", protocol selection "ESP", check "3DES", check "SHA1", PFS selection"2 (1024bit)” As a result, the P2 stage is configured, and the final step is to configure the user.
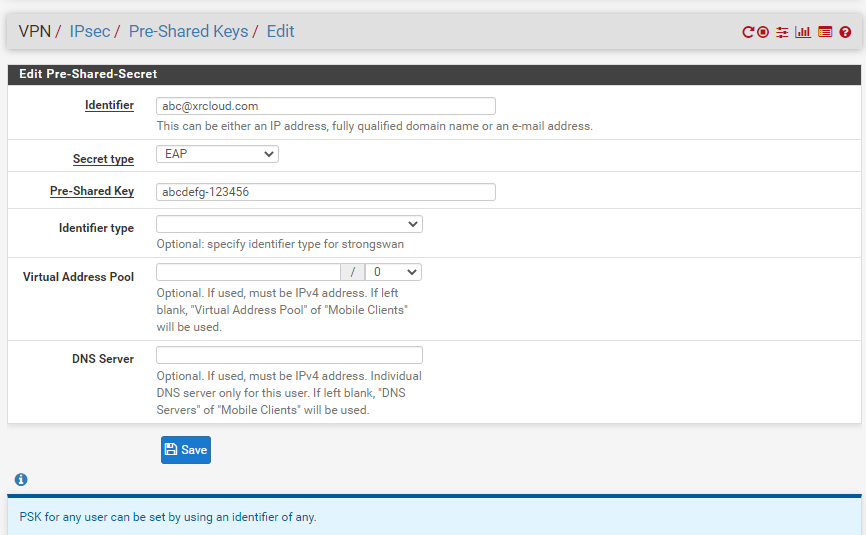
For configuring the users to enter "Pre Shared Keys", select the green button "Add" in the lower right corner
For Configure Identifier, please fill in our IPsec IKEv2 user name, the instance configuration is [email protected], the encryption method is "EAP", the shared key is entered in a combination of letters with a higher security level, and the configuration here is "dfeijfiejif8! 829", this is the client's password. Finally, save the information above in order to complete the server configuration.
The VPN configuration is now complete, and we need to configure the firewall's inbound and outbound rules.
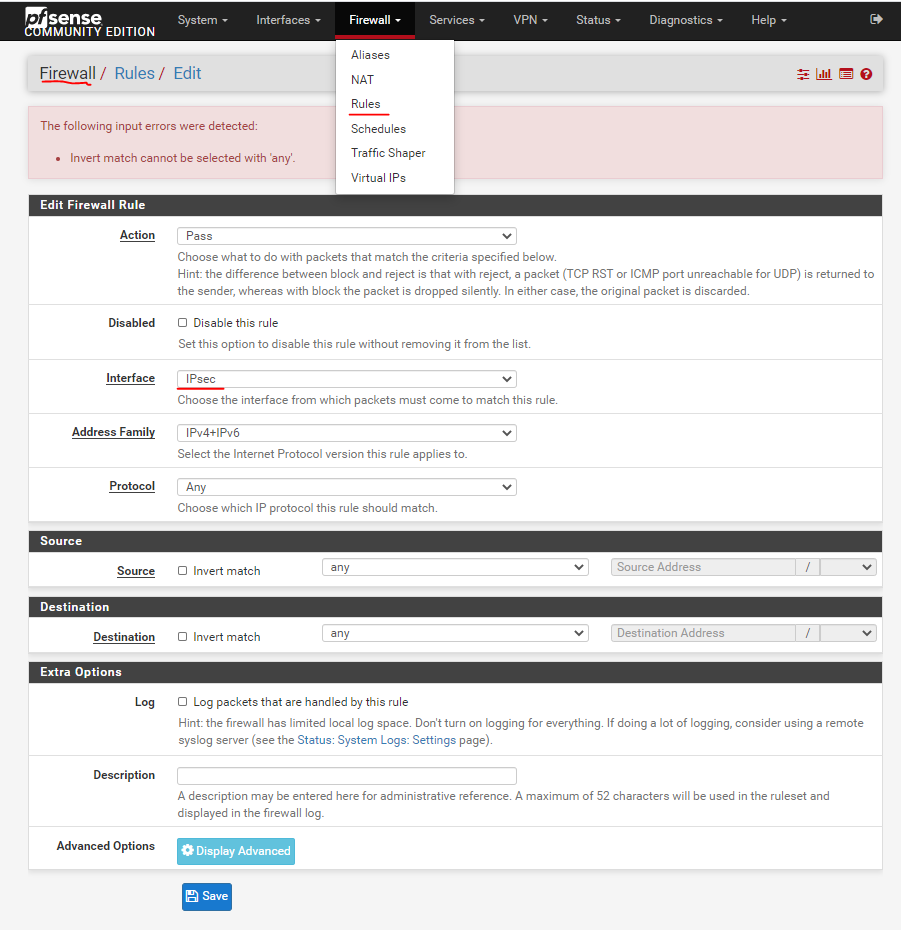
Please select Firewalls->Rules->IPsec, and select "ADD". Then a configuration page pops up.
Please Select:
Action option configuration "Pass";
Interface option is configured as "IPsec";
The Address Family option is configured as "IPv4+IPv6";
Both Source and Destination options are configured as "Any"
Finally select "Save"
The above completes the configuration of pfsense's IPsec rules.
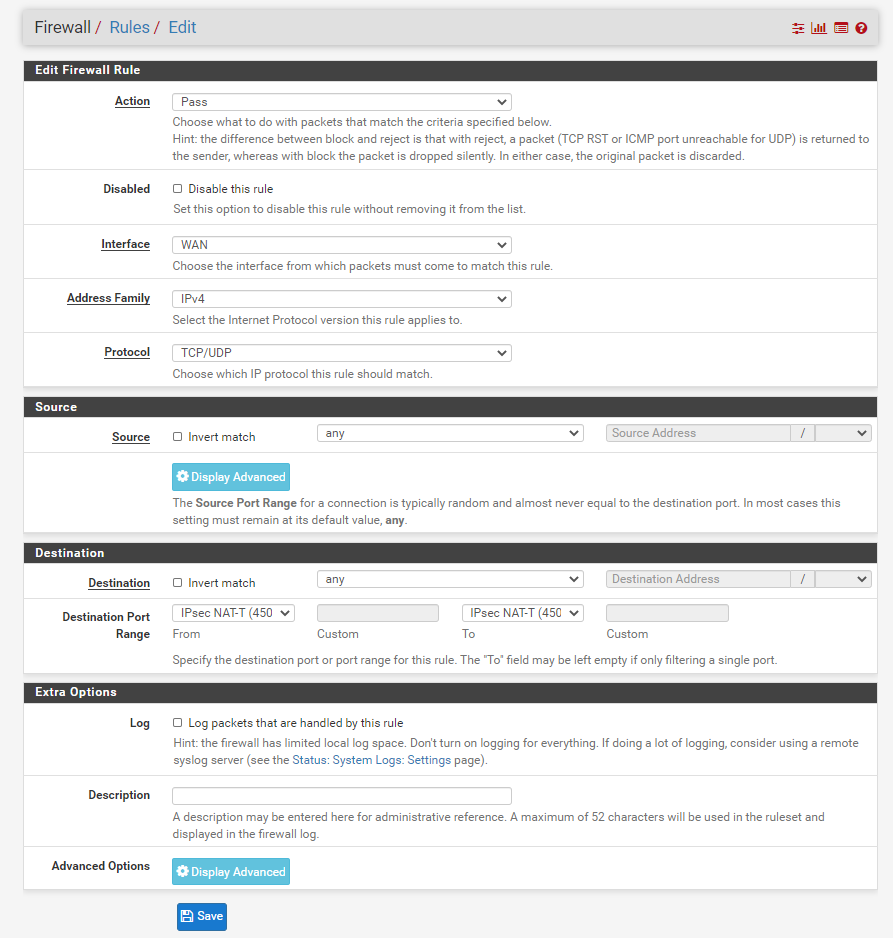
Finally, we will need to configure the firewall's WAN port rules to release the ports used by the IPsec service.
Please select Firewalls->Rules->WAN, and then we choose "ADD". Then a configuration page pops up.
We select
Action option configuration "Pass";
Interface option is configured as "IPsec";
The Address Family option is configured as "IPv4+IPv6";
Protocol configuration is "TCP/UDP";
Source configuration is "Any";
The destination is configured as "any"
Destination Port Range select "IPsec NAT-T(4500)"
Finally select "Save"
The actions above will release Port 4500
Next, we configure the release of Port 500. As above, Firewalls->Rules->WAN, then we select "ADD". Then a configuration page pops up.
We select :
Action option configuration "Pass";
Interface option is configured as "IPsec";
The Address Family option is configured as "IPv4+IPv6";
Protocol configuration is "TCP/UDP";
Source configuration is "Any";
The destination is configured as "any"
Destination Port Range select "ISAKMP(500)"
Finally select "Save"
This will release Port 500

We have completed the server configuration of the entire IPsec IKEv2 VPN;
For the next article, we will introduce the client configuration, which includes:
-iPhone/Mac OS client
-StrongSwan Android Client
-Configure Windows client
Stay tuned for the updates !!
If you have any questions, please contact us at [email protected] or submit a support case.


No comments